
How to Manage Landed Costs Using DEAR Systems
DEAR Systems provide a variety of services which can be beneficial to your business. One of the most beneficial features is helping you manage your landed costs. This is achieved by taking insurance, customs and miscellaneous fees into consideration, giving you a more well-rounded overview of how much profit you’ve really made.
There are three ways in which you can manage your landed costs and, if you are not familiar with DEAR’s modules, here’s an overview of what you need to know.
Additional Costs
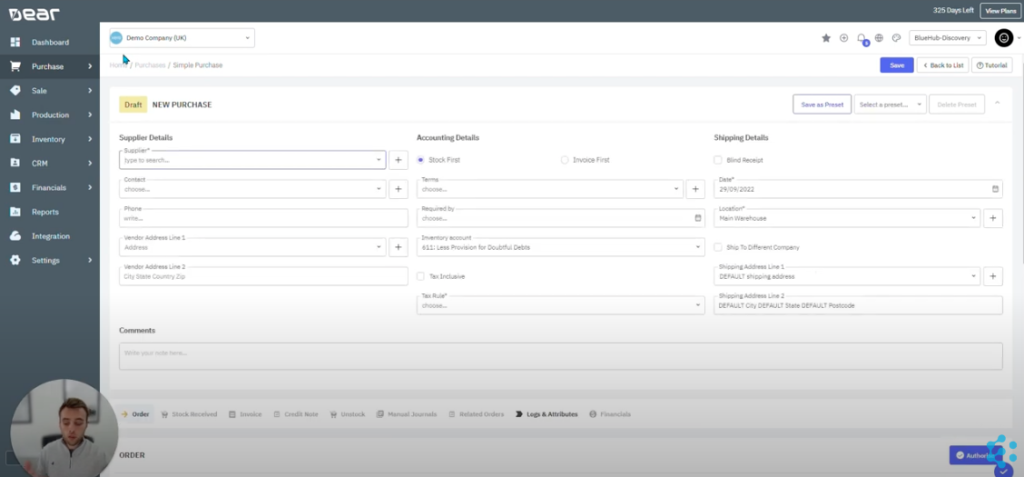
When creating a new simple purchase, you’ll need to start by adding your supplier’s details, along with the purchased product and quantity.
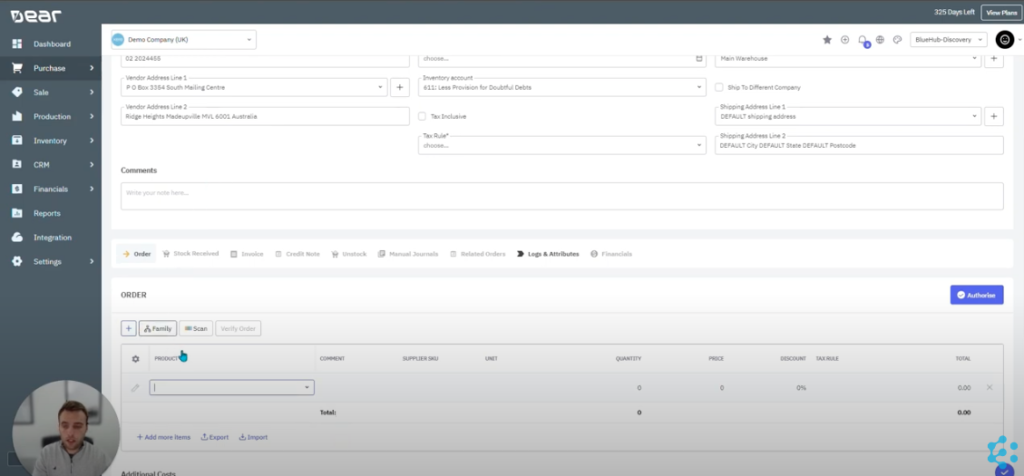
Next, move on to your additional costs, where you can add the unit price, cost of shipping, and tax rule. The latter of the three can be added when initially completing your supplier’s details into your DEAR dashboard.
Once the purchase has been authorised, you can copy the order into the Stock Received and Invoice tabs respectively. It’s important to click Copy from Order when doing so.
Before confirming the order, to ensure accuracy, check that both the tax rule and accounts match when verifying the invoice.
Manual Journals
When the invoice has been verified, move on to the Manual Journals tab which will appear on your screen afterwards.
When opening the tab, you’ll need to add your debit and credit accounts – we recommend you add your inventory account (debit) and your expense account (credit). It’s also worth adding a reference along with your accounts, as well as the order number it applies to. Additionally, you can add a variety of other parameters. These include cost, quantity, weight, and volume. For anything else, you can add this data in manually.
Separate Purchase Invoice
By having both of your methods on the system, you can then allocate your expenses.
Similar to adding your additional costs, start off by adding the details of your supplier. Be aware this time that you need to make sure you click on both the Invoice First and Blind Receipt icons in the section.
After completing the details, move down to the invoice and start filling in the information that your supplier has given you. This includes the invoice number, date and due date.
As you would for your additional costs section before, fill your information accordingly. But this time, include your credit account rather than your debit in the details.
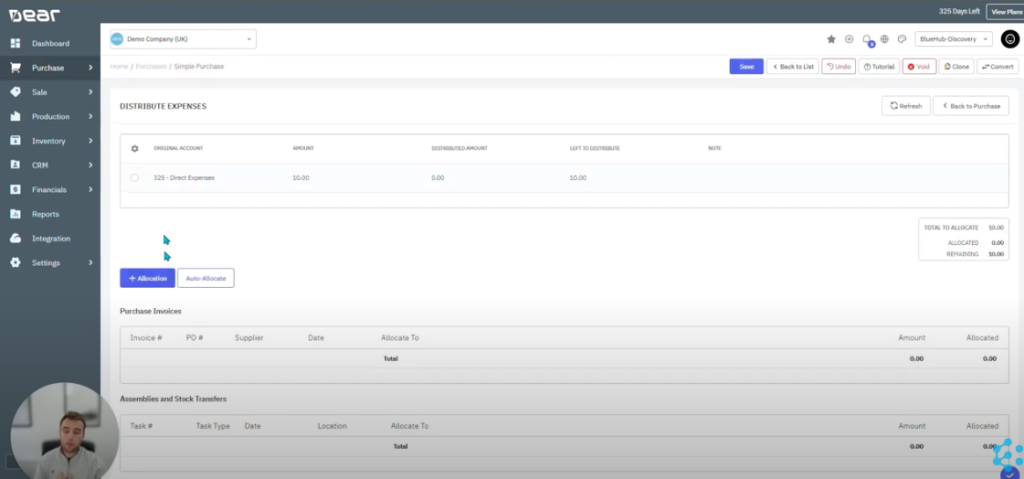
Once authorised, you will see the Expenses icon. Once selected, you’ll see all the different types of expenses which can be allocated to different areas of the business. These include assembly, stock transfers and production.
Next, choose your invoice number. From here, you can choose how much money you want to allocate to these expenses – this can also be done automatically using the Auto-Allocate icon above.
If you want to add another invoice simultaneously, select the Allocate button and add another purchase invoice. From here, you can change how much money you want to allocate to your orders at the same time.
Once the allocation has been processed, use your PO number to go back to the order and open up a new manual journal.
To see how to complete all landed costs in DEAR step-by-step, watch our YouTube video below. For more tips and guidance on how to effectively use DEAR for your business, visit our YouTube channel.