


This article walks you through the DEAR Systems Sales Dashboard, showing how to navigate sales data, create new orders, manage fulfilment stages, and generate invoices with ease. Whether you’re new to DEAR or looking to refine your process, you’ll learn the essential steps for completing a sale from start to finish.
What you’ll learn:
-
How to access and filter sales in the DEAR dashboard
-
Creating and managing sales orders
-
Handling picking, packing, and shipping stages
-
Generating invoices and processing payments
-
Using related orders, attachments, and financial views for better tracking
The DEAR Sale module provides a wide range of features that supports your on-going business. Some of the features includes quote creation, development of sales orders and invoices and tracking all of your sales as they move through your picking and packing process.
If you’re new to using the DEAR Sales module, in this blog we’re going to take you through some these features in more detail, and how to complete a quick and simple sale within your DEAR dashboard.
How do you access and use the Sales dashboard in DEAR?
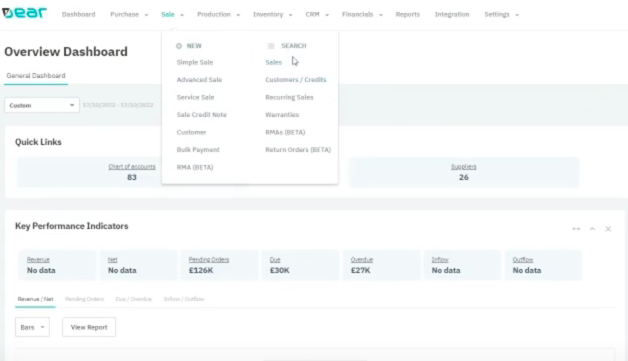
To access and use the Sales dashboard in DEAR, log into your account, go to the Sales option in the header, and under the Search header select Sales, where you can view, search, and filter every sale ever recorded in your account.

Within the sales dashboard you can view every single sale that has ever occurred within your account. With this volume of data, you can also search and filter your sales to drilldown deep into your data. By using the dropdown option, you can select different pre-set views for your data:

This view is pre-set at General, but there are other views you can use. On the top left of your data, you can also filter by Accounting, which shows documents attached to your sales and the client you’re selling to. In the Fulfilment tab you can view all sales statuses, including back ordered, order picked, etc and see whether any orders are overdue.
How do you create a new sale in DEAR?
To create a sale, go back into the General view and select the plus button. This will generate a brand new, simple sale:

The first thing we need to do is select a customer that we want to sell to. By selecting the Custom field, you can view all your customers on your system easily. Once you select the preferred customer, any relevant data will appear such as customer terms, account sales rep, shipping details, etc; any data that has been set up in the backend of the system as a default. Any items that have not been set as a default, for example the billing address line, can be selected from the dropdown options populated.
To complete a sale on the DEAR system, certain mandatory fields must be completed – these are easy to spot with the asterisk, but some of these include:
- Customer
- Billing Address
- Sales Rep
- Account
- Tax Rule
- Location
- Shipping Date
To add items to the order, scroll down on this view to the Order section:

Our line items are anything that we are selling (i.e. products). Additional Charges and Services is where we will add extra charges such as a shipping line.
Add in your products and, against each product, add in the quantity of each product and the unit cost. Within the example below we’re also going to add in a service line for shipping:

Once your items and additional charges have been entered, select the Authorise button at the top right of the Order box and from the dropdown, select ‘Allocate this Stock’. In the event you have no stock available, this is where you can then select to put this order on backorder.
As our order has been put into backorders, we can create a separate purchase order so we can sell it on the sales order.
Once the stock is in the system, you can move to the Pick stage of the order. Within the DEAR inventory management system, you can auto pick your products and authorise these to move along in the order process, which is the Packing stage. At each of the stages you can print out any documents you need, for example sales orders when at the invoice stage and invoice receipts, etc.
To pack your order, select the ‘Copy from Pick’ option which will pull through all the details from the picking stage (item, quantities, the number of packages, etc). Once you’re happy with this, authorise this stage and move onto Shipping. Within the Shipping option you can autofill in the individual packages – your carrier will auto populate from the initial order details. And again, authorise this stage.
How do you create an invoice from DEAR?
From the same view, select the Invoice option – this will pull through all the data from the previous order stage:

Within this view you’ll find the invoice date and due date and the system will automatically assign an invoice number. Once you’re confident everything is in from your order, you can authorise this.
Depending on the customer’s account, you may see some alerts such as whether the customer has any credit on their account which can be used on the order, which you can either approve or decline.
If for any reason you do need to authorise a credit note or a restock, these tabs will be enabled. You can simply copy from the invoices or the restocking stage if this is needed to complete a sale.
How to view a sale in the DEAR Inventory System?
To view a sale that has been added into the system, select the ‘Sales’ option from the top of the page breadcrumb.

This will show that the sale we’ve inputted during this example has been fulfilled and invoiced – the only thing we’re waiting for now is payment, which is illustrated by the yellow icon.
You can add payment lines within the Sales dashboard, but this will be marked as paid within Xero, which can be integrated with your DEAR inventory management system.
Some of the other tabs you can use within this view include:
- Related orders: This is for anything you have that is related to the order, for example if you were to generate the purchase order when you need to buy in goods, this would show the purchase order that was generated.
- Attachments: Here you can see the logs and attributes, so you can see when the sale was created and every stage it’s been in, who created it, etc.
- Financials: Here you can view all of the accounts that the payments and sales have been accredited to and the dates these occurred.
To see how you can complete all of these stages stage, by stage, watch our video below:
For more help on how to use DEAR successfully, take a look at our YouTube channel or read more of our blogs.
Frequently Asked Questions about Using the DEAR Systems Sales Dashboard
1. How do I access the Sales Dashboard in DEAR?
Once you’re logged into your DEAR account, just click on the Sales tab in the header and then select Sales under the Search header. From there, you’ll be able to view and filter all your past sales using different tabs like General, Accounting, and Fulfilment.
2. What’s the easiest way to create a sale in the DEAR Sales module?
To create a new sale, go to the General view in your Sales dashboard and hit the plus button. You’ll then select a customer, fill in the required fields (like billing address, sales rep, and tax rule), and add your products and any additional charges like shipping. Once that’s done, you can allocate stock and move the order through the pick, pack, and ship stages.
3. Can I put sales orders on backorder in DEAR?
Yes! If stock isn’t available when you try to allocate it, DEAR gives you the option to put the sale on backorder. You can even create a related purchase order so you can fulfill that sale as soon as the items are restocked.
4. How do I generate and approve an invoice in DEAR?
In the same Sales view, you can select the Invoice tab once your order is packed and ready. DEAR pulls in all the data from the previous stages and auto-generates invoice numbers. You’ll be able to set the invoice and due dates, check for any customer credits, and authorize the invoice when you’re ready.
5. What can I see in the Sales order view after a sale is created?
From the Sales breadcrumb, you’ll see whether the order is fulfilled, invoiced, and if payment is pending (marked by a yellow icon). You can also access tabs like Related Orders, Attachments, and Financials to review all documents, logs, and account allocations tied to that sale.


